Right Required: Author Insights
Create, configure, and manage Smart Insights configurations on the Configure Insights page.
Topics on This Page
Create Smart Insights Configurations
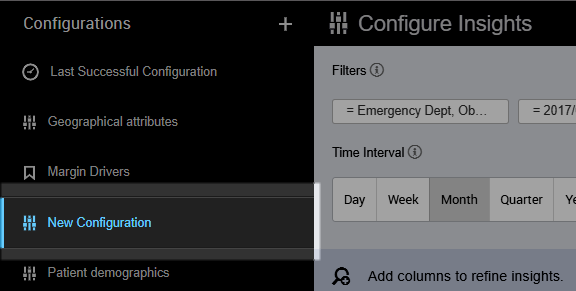
- On the Configure Insights page, click Saved Configurations.
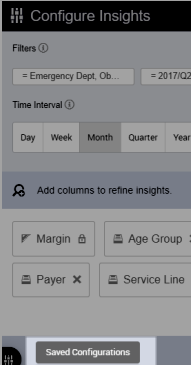
- Click Add Configuration.
- In the New Configuration field, type a name for the configuration.
- Add or remove columns and specify the Time Interval.
- Click Save.
 Optional:Create Another Configuration
- Click Add Configuration.
- In the New Configuration field, type a name for the configuration.
- Click Save.
Configure Smart Insights
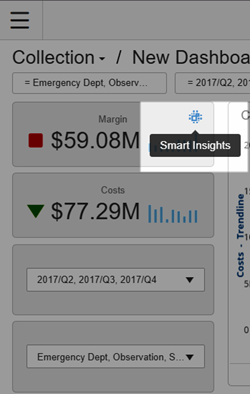
- On the KPI
 Key Performance Indicator, a measurement of performance. Organizations measure activities related to successfully meeting their objectives, such as profitability or acquiring new customers., click Smart Insights.Note: Dashboard filters are applied to the KPI
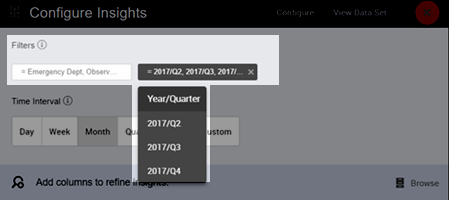
 Key Performance Indicator, a measurement of performance. Organizations measure activities related to successfully meeting their objectives, such as profitability or acquiring new customers.. Edit or remove the filters before you start your analysis.
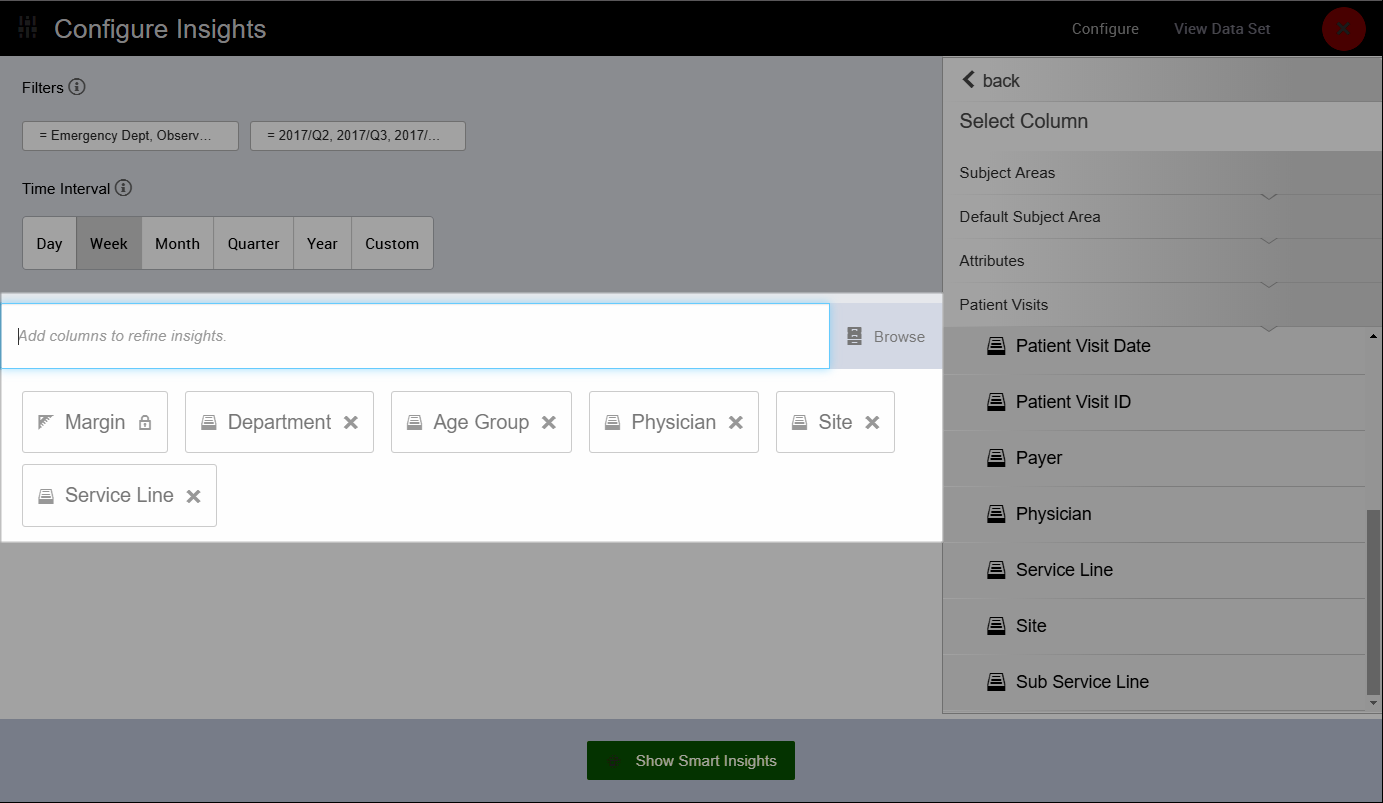
 - On the Configure Insights page, click Browse to search for columns or click in the search bar to type. Add additional columns for Insights to determine which measures and attributes are the main drivers behind the KPI. Tip: Start with 5–10 attributes from different dimensions. Varied columns help analyze the KPI in unique ways to get more options when looking for insights.
- In the Time Interval section, select Day, Week, Month, Quarter, Year, or Custom.
.png) Note: This field impacts how Insights plots your data.
Note: This field impacts how Insights plots your data. - Click Saved Configurations to view, edit, or create saved configurations for this KPI.
- Click Show Smart Insights.
Note: Insights identifies the attributes and measures explaining your KPI and plots them for you.
- Click Save to create a new dashboard with your Smart Insights results.
- Access new reports from Collection Manager.
Manage Smart Insights Configurations
- On the Configure Insights page, click Saved Configurations.

- Select your configuration. The name of the currently selected configuration is highlighted in blue.
- Add or remove columns and specify the Time Interval.
- When you make changes to the configuration, the configuration name is no longer selected. Complete one of the following processes, if necessary:
- Set as Default
- Overwrite
- Delete
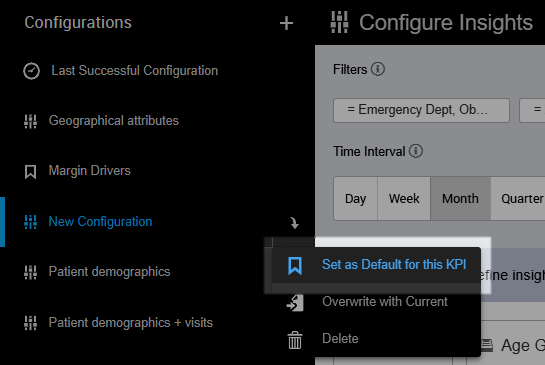
- On the configuration you want, click More.
- Select Set as Default for this KPI.
- The bookmark icon now displays for this configuration to indicate it is the default configuration for the selected KPI. Note: The default configurations from the parent KPIs will not be assigned as the default to the child KPIs.
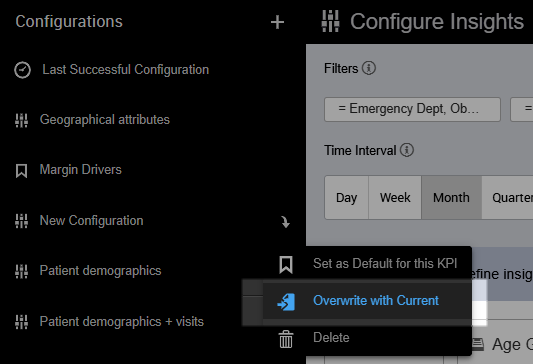
- On the configuration you want, click More.
- Select Overwrite with Current.
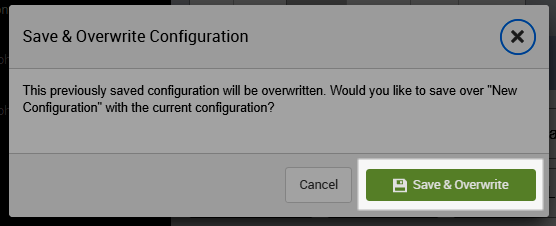
- On the Save & Overwrite Configuration pop-up, click Save & Overwrite. Note: This replaces the configuration's settings with the current settings.
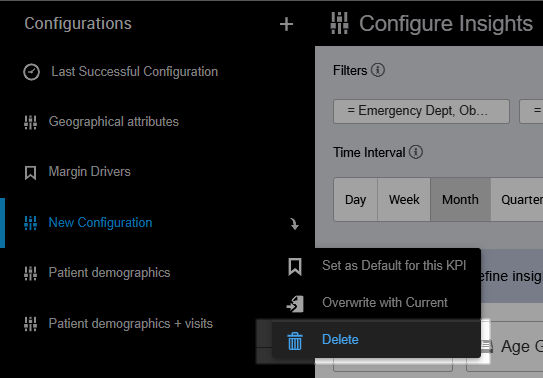
Warning: The following steps permanently delete a configuration; this action cannot be undone.- On the configuration you want, click More.
- Select Delete.
- On the Delete Configuration pop-up, click Delete.

