Right Required: Author Insights
Notifications send regularly scheduled emails with an attachment of either a single report or entire dashboard. Notifications show a snapshot of the report at the time the notification is created.
Notifications for Dashboards and Visualizer dashlets can use single value Repository Variables in applied filters to dynamically display data for your notifications.
Dynamic notifications have the following limitations:
- Only single value Repository Variables are supported. Multi-value variables are not supported.
- If you convert a Repository Variable used in a notification to a Session Variable, the notification will continue to run as a Repository Variable.
- If you use an incompatible variable with a filter, the Dashboard notification will ignore that filter, but this will cause dashlet notifications to fail.
- The following filter types are not supported:
- Filters containing the operators ( is missing ), ( is not missing ), ( between ), or ( outside ).
- Custom Group Filters.
- Custom Set Filters.
- Global Filters.
Create a Notification for a Dashboard
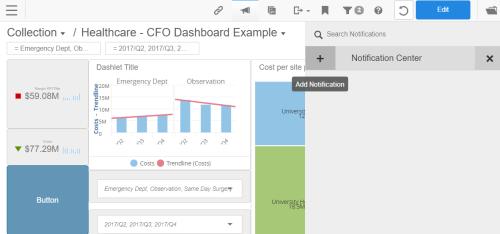
- From the top menu bar on your Dashboard, select Notification.

- Select Add Notification.
- Enter the following notification details:
- Notification Name—This displays as the name in your Notification Center. It is not visible in the sent email.
- To—Enter the email addresses. When sending this email to multiple addressees, separate emails with a semicolon and no spaces. For example, MyBoss@myCo.com;Me@myCo.com.
- Title—This is the email subject line.
- Message—This is the email body. Add variables using the V{variable_name} syntax.
- Repeats—Select the frequency to send the email. Select from one of the three options in the drop-down:
- Daily
- Weekly
- Monthly
- At—Specify the time and time zone for when to send this email.
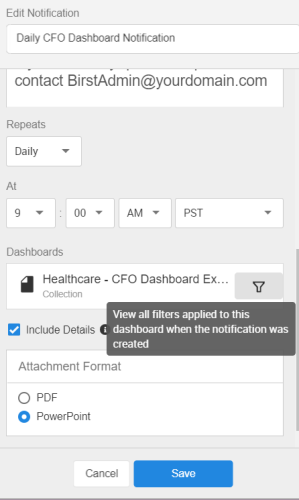
- Dashboards—See which Dashboards the notification is applied to and the filters applied to the dashboard.
- Notifications are created with the filters that were applied to the dashboard when the notification was first created. Filters can use repository variables to dynamically display data for your notifications. For example, you might use a repository variable for yesterday's date to show the finalized sales numbers for the previous day.
- To view the filters applied to, select Edit from the More Actions menu.
- Click the Filters icon on the Dashboard.
- View the enabled filters for the dashboard. For variables, the default value the variable populates displays in the drop-down. If you select the variable from the drop-down list and save, the default value is no longer visible.
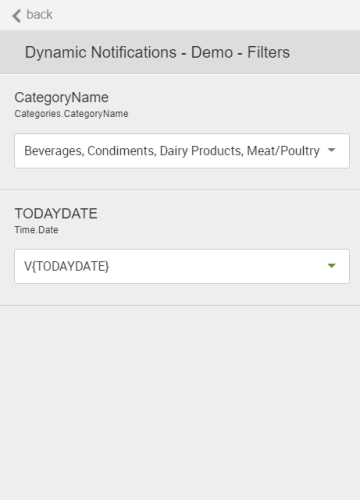
- Variables are not supported in the following filter types:
- Filters containing the operators ( is missing ), ( is not missing ), ( between ), or ( outside ).
- Custom Group Filters.
- Custom Set Filters.
- Global Filters.
- Click Back to return to edit the notification.
- Notifications are created with the filters that were applied to the dashboard when the notification was first created. Filters can use repository variables to dynamically display data for your notifications. For example, you might use a repository variable for yesterday's date to show the finalized sales numbers for the previous day.
- Select Details—Includes the collection, dashboard, report names, timestamp, and the applied filters.
- Attachment Format—Dashboards support PDF and PowerPoint formats.
- Click Save. This notification is now visible from the Notification Center.
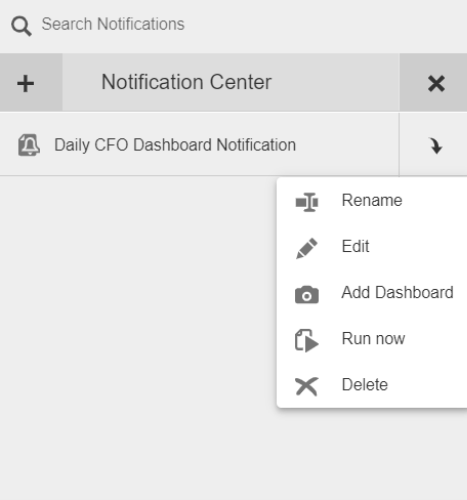
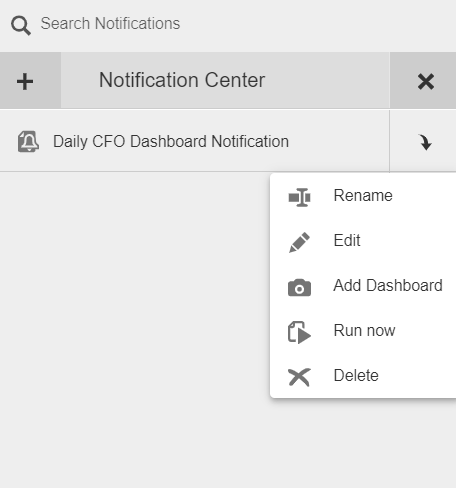
- From the Notification Center, click More Actions. This menu gives you access to the Rename, Edit, Add Dashboard, Run Now, and Delete commands.


Create Notifications for a Visualizer Dashlet
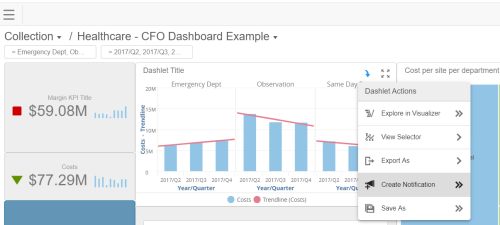
- From the Visualizer report dashlet, click More Actions - Create Notification.
- Enter the following notification details:
- Notification Name—This displays as the name in your Notification Center. It is not visible in the sent email.
- To—Enter the email addresses. When sending this email to multiple addresses, separate emails with a semicolon and no spaces. For example, MyBoss@myCo.com;Me@myCo.com.
- Title—This is the email subject line.
- Message—This is the email body. Add variables using the V{variable_name} syntax.
- Repeats—Select the frequency to send the email. Select from one of the three options in the drop-down:
- Daily
- Weekly
- Monthly
- At—Specify the time and time zone for when to send this email.
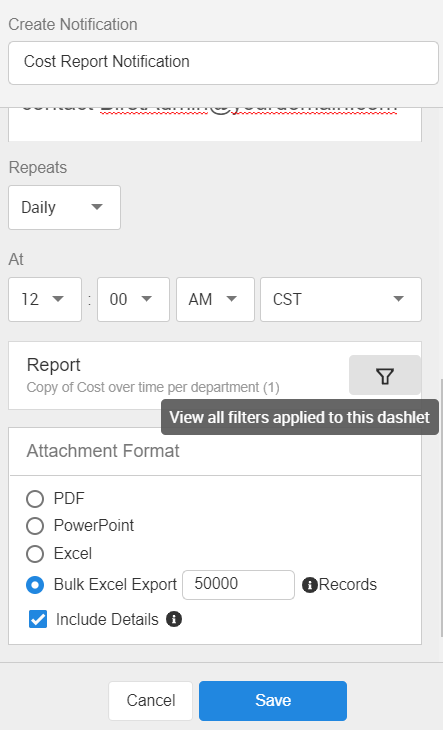
- Reports—See the reports associated with this notification and the filters applied to the report.
- Notifications are created with the filters that were applied to the report or dashboard when the notification was first created. Filters can use repository variables to dynamically display data for your notifications. For example, you might use a repository variable for yesterday's date to show the finalized sales numbers for the previous day.
- To view the applied filters, select Edit from the More Actions menu.
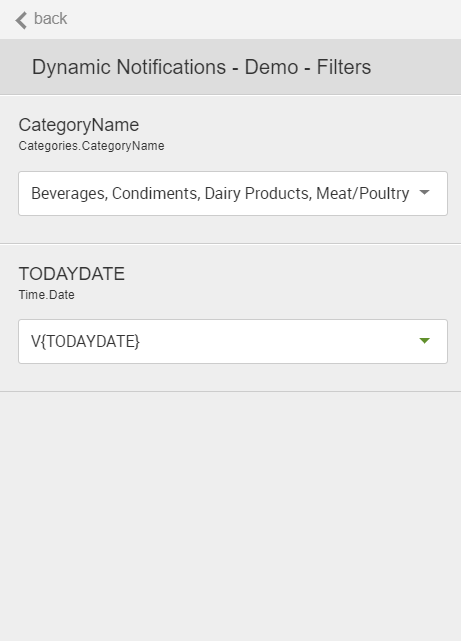
- Click Filters on the report.

- View the enabled filters for the report. For variables, the default value the variable populates displays in the drop-down. If you select the variable from the drop-down list and save, the default value is no longer visible.
- Variables are not supported in the following filter types:
- Filters containing the operators ( is missing ), ( is not missing ), ( between ), or ( outside ).
- Custom Group Filters.
- Custom Set Filters.
- Global Filters.
- Select Back to return to edit the notification.
- Notifications are created with the filters that were applied to the report or dashboard when the notification was first created. Filters can use repository variables to dynamically display data for your notifications. For example, you might use a repository variable for yesterday's date to show the finalized sales numbers for the previous day.
- Select Details—Includes the collection, dashboard, report names, timestamp, and the applied filters.
- Attachment Format—Reports support PDF, Excel, and PowerPoint formats. If the Enable Download ACL is enabled for a user, they can bulk export using Excel.
- Select Save. This notification is now visible from the Notification Center.
- From the Notification Center, click More Actions. This menu gives you access to the Rename, Edit, Add Dashboard, Run Now, and Delete commands.